
Spooky Sewalong Part III: Spooooky Softies
Guest written by Jane Youn
Welcome to our Candy Please! Spooky Sewalong Part III: Spoooky Softies. We are going to have a great time sewing up some curvy swerve-y pillow pals today! You can find the Candy Please! Project Panel at fine retailers of Moda Fabrics nationwide. For today's steps we're going to need the following supplies:
- The strip of Cute Halloween Shapes
- About a 1/2 yd coordinating fabric for backing
- Polyester Fiber Fill
- A chopstick, crochet hook, or bodkin, anything long and skinny that you can help turn your softies out through the gap
- Sewing Supplies! You know, scissors, thread, pins or clips, a sewing machine, all the classics.
- Jelly beans for fortitude
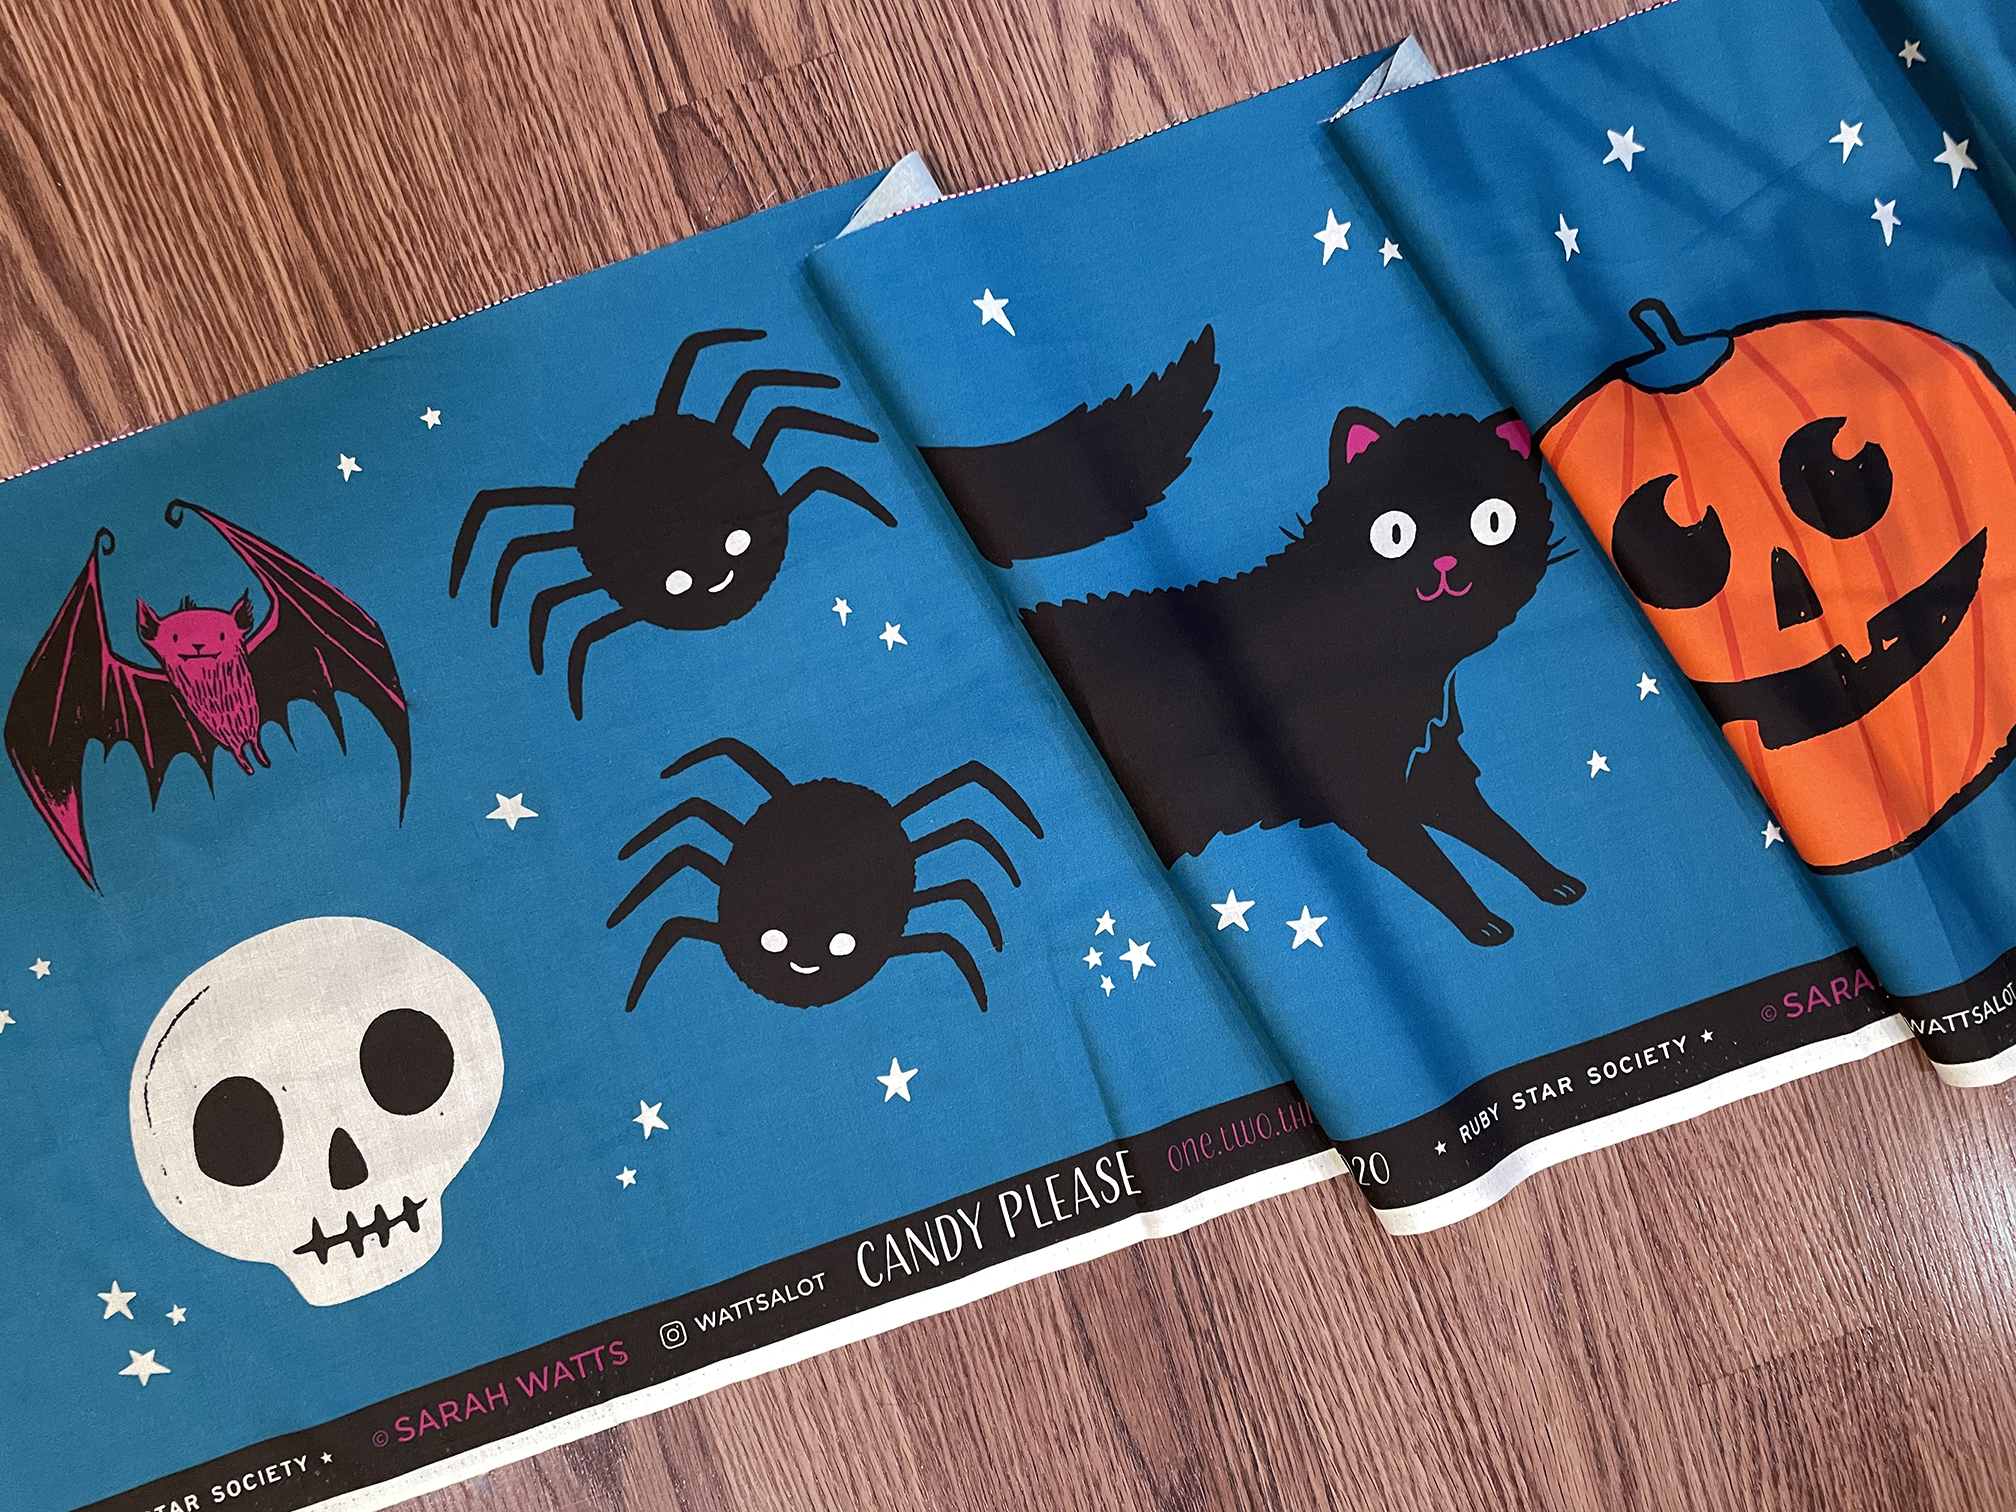
So in Part I, we carved up the whole Candy Please! panel. Today we're going to use about half of the long strip of cute Halloween shapes. We'll use the other half next week for pillows! For this project I really want to highlight all of those cute, curvy shapes. But we don't want to accidentally cut up too much fabric so that we can reserve some of the graphics for rectangular-shaped pillows next time. Plan your cuts carefully!
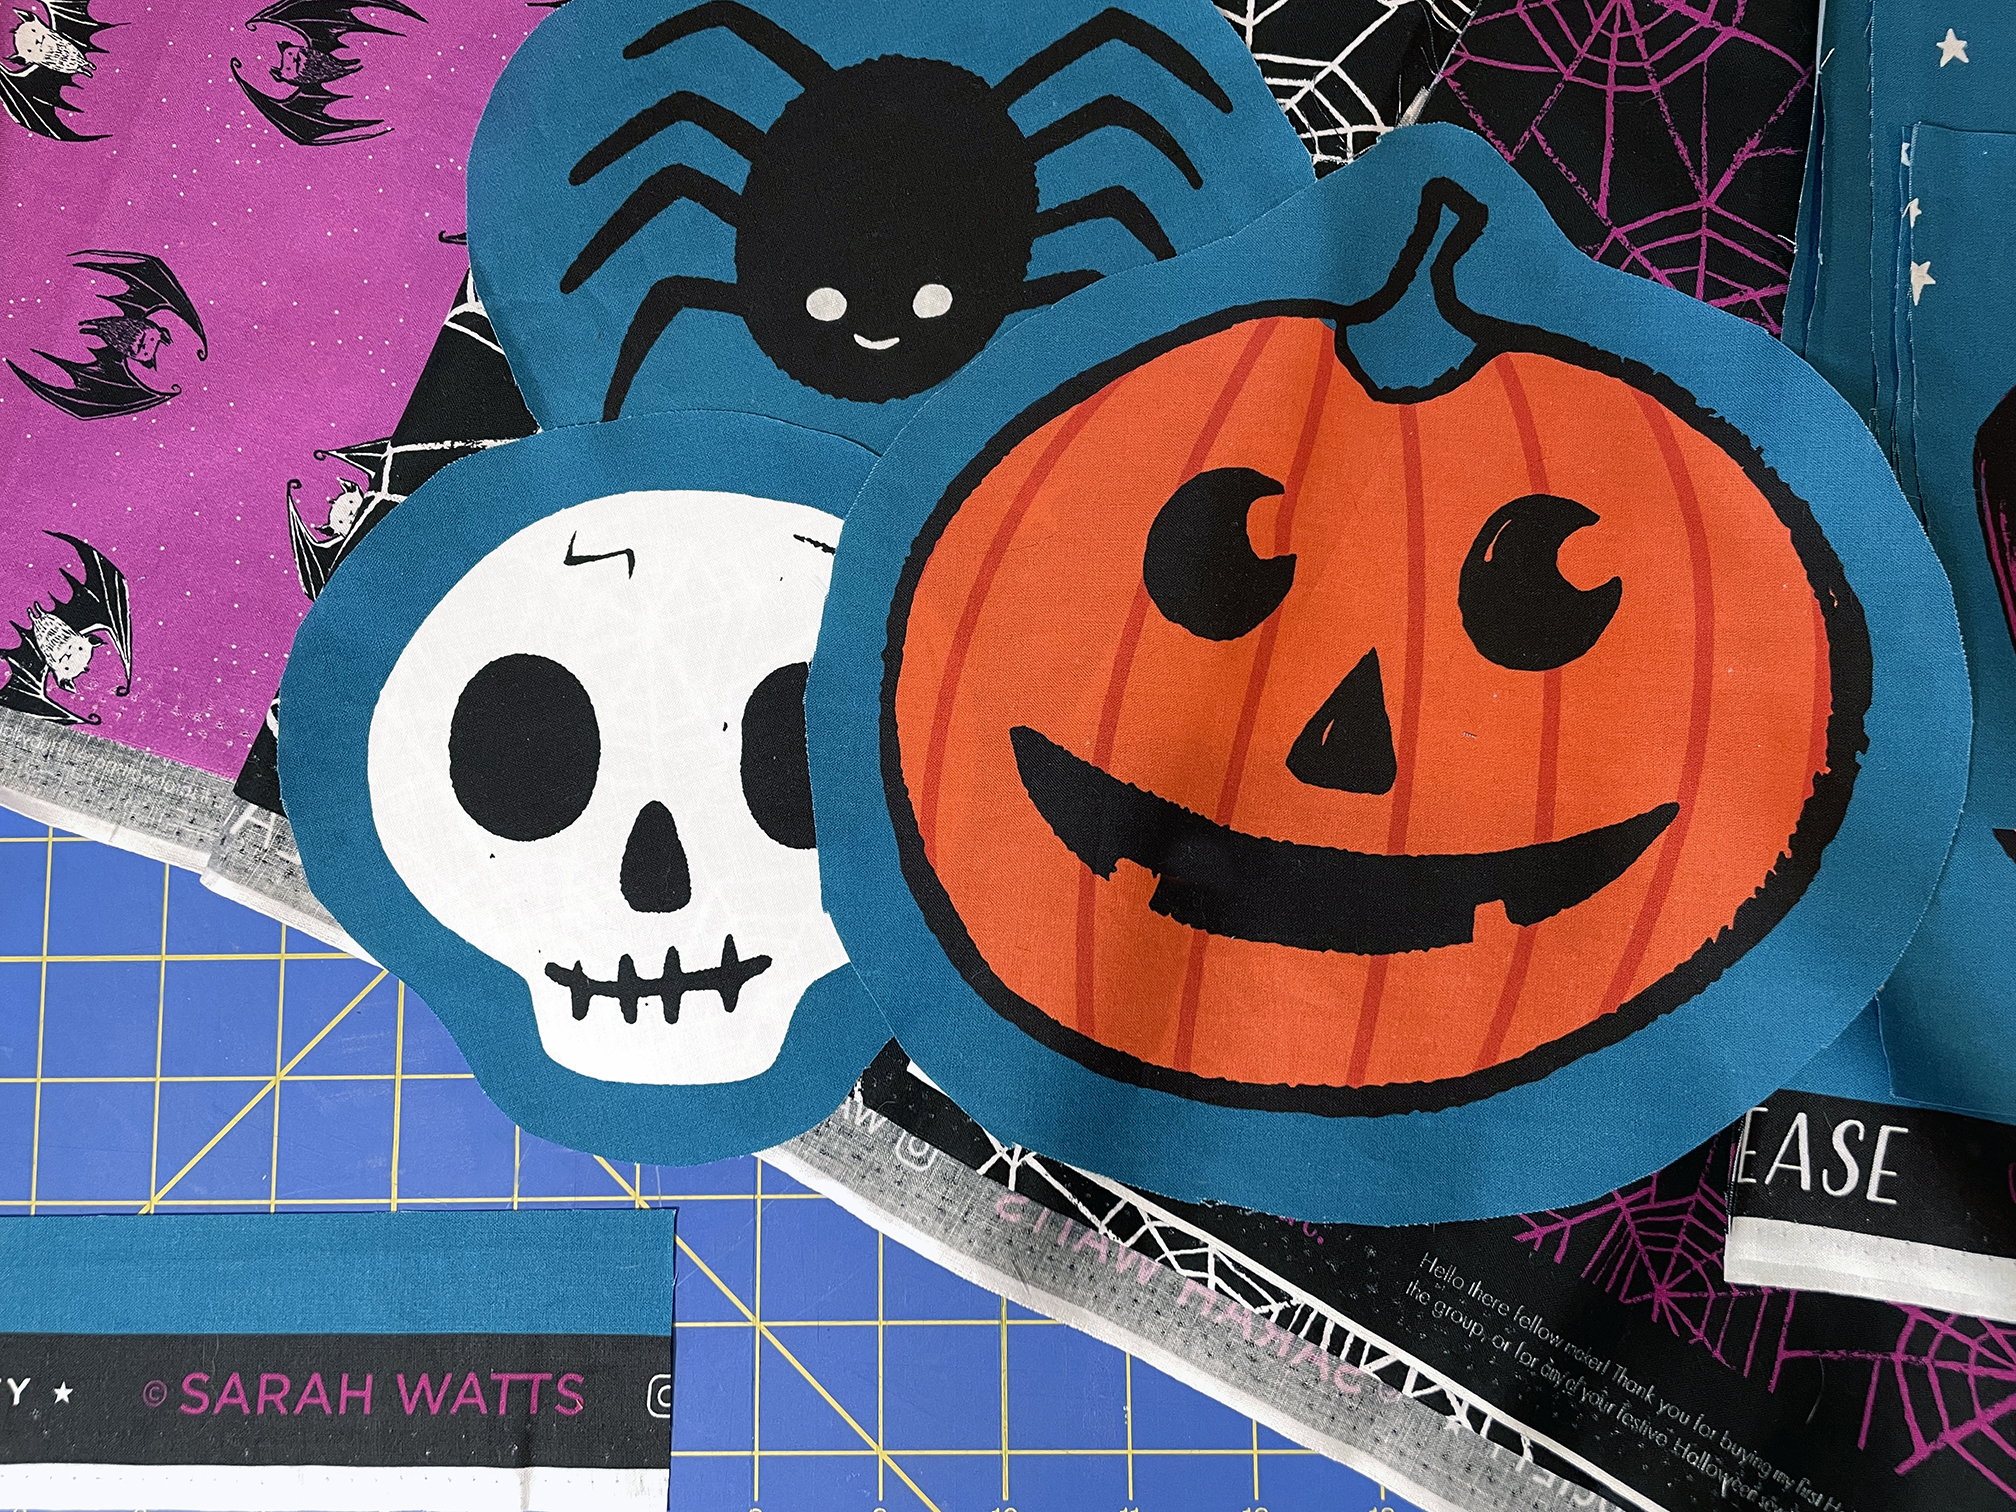
Cut out the main shapes (carefully!), leaving some blue background around the border. We have: a Black Cat, a Pumpkin, a Bat, a Skull, and a Spider. I like to follow the edge of the design kind of loosely, and leave about 1/2"-1" of blue space around the motif. Think in gradual curves as you cut. You can always trim down further if you want to exaggerate the outline of your softy more. For the Skull, the Pumpkin, and the Spider I used a more round oval shape, but the Black Cat and the Bat both offer the opportunity to do some fun curvy shapes! Just remember that the tighter corners will be harder to sew AND harder to stuff.

When you're finished trimming the softies into shapes you like, you can use the front pieces as pattern pieces to cut the backing out. I'm using Sarah Watts' coordinating panel of Candy Please Fat Quarters, but you could also use about a half yard of anything fun. Make sure to have your main piece and your backing fabric right sides facing while cutting out, as the softies might not be symmetrical depending on how you trimmed your curves.
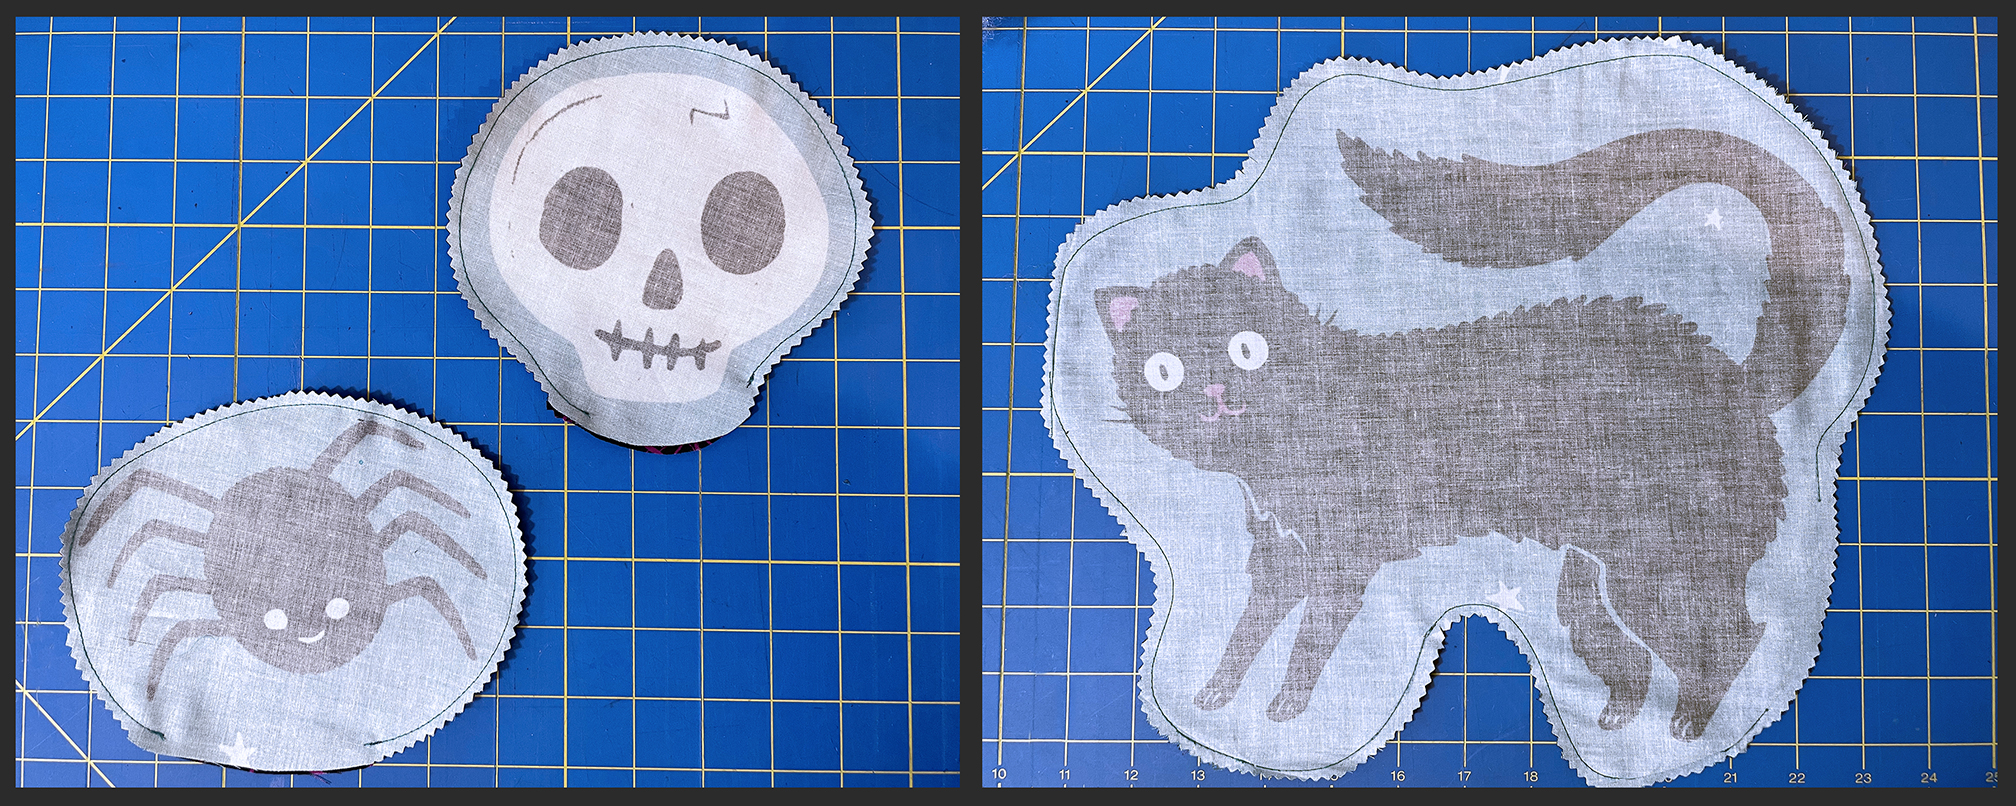
Now it's time to pin your fronts and backs together and sew them up with a 1/4" seam allowance. For each softy, choose a starting and stopping place somewhere straight-ish where you know you can leave a 3"-4" gap and still be able to press it neatly when it's time to turn through. For instance, on the Cat my gap is more towards the back, because if I used the bottom like I did on the rounder elements, it would be hard to close at the end. After you stitch your softies all together, you can use pinking shears to trim the seam allowances. Further, if you have any tighter curves like I do on the Cat and Bat, make small clips into the seam allowance up to, but not through, the stitching. This will help prevent puckering in those areas.
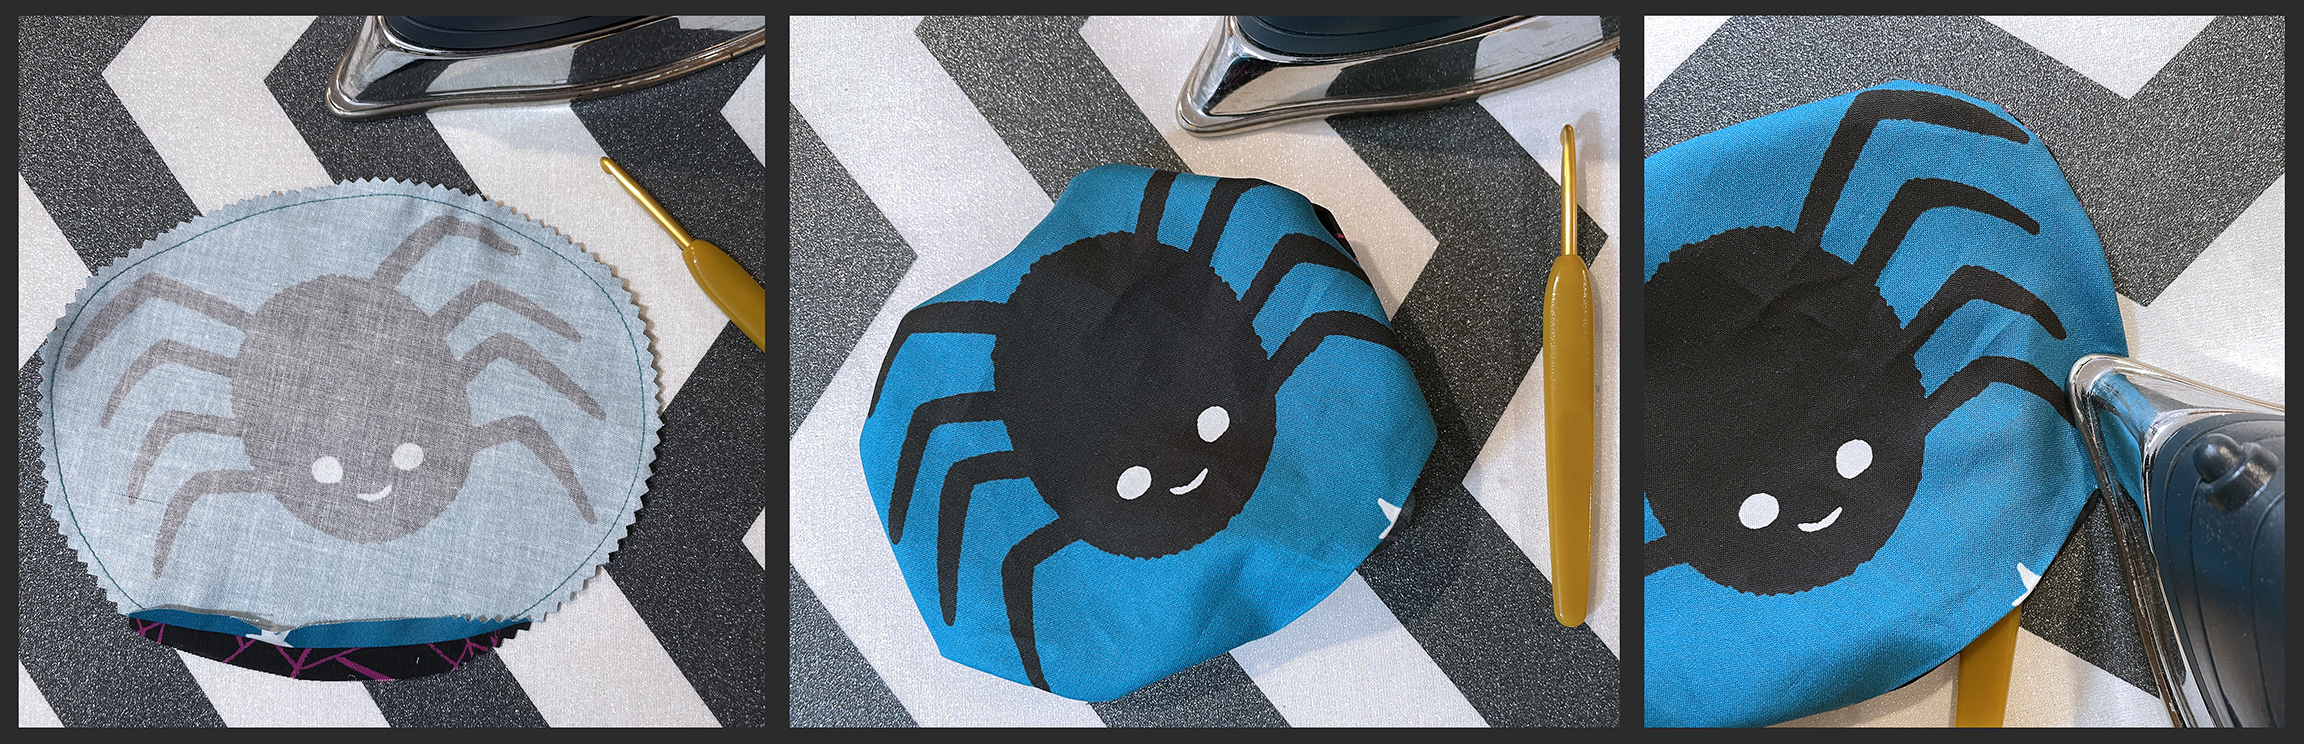
Before I turn the softy through, I like to press the seam allowances open along the gap. This will help you close the gap in the future. Once that's done, go ahead and flip everything through the gap so the right sides are facing outwards! I like to run a crochet hook or a bodkin through from the inside as I press the whole softy flat. That way the curve stays nice and smooth and helps prevent puckering. Save the puckering for any sour candies in your Halloween basket.
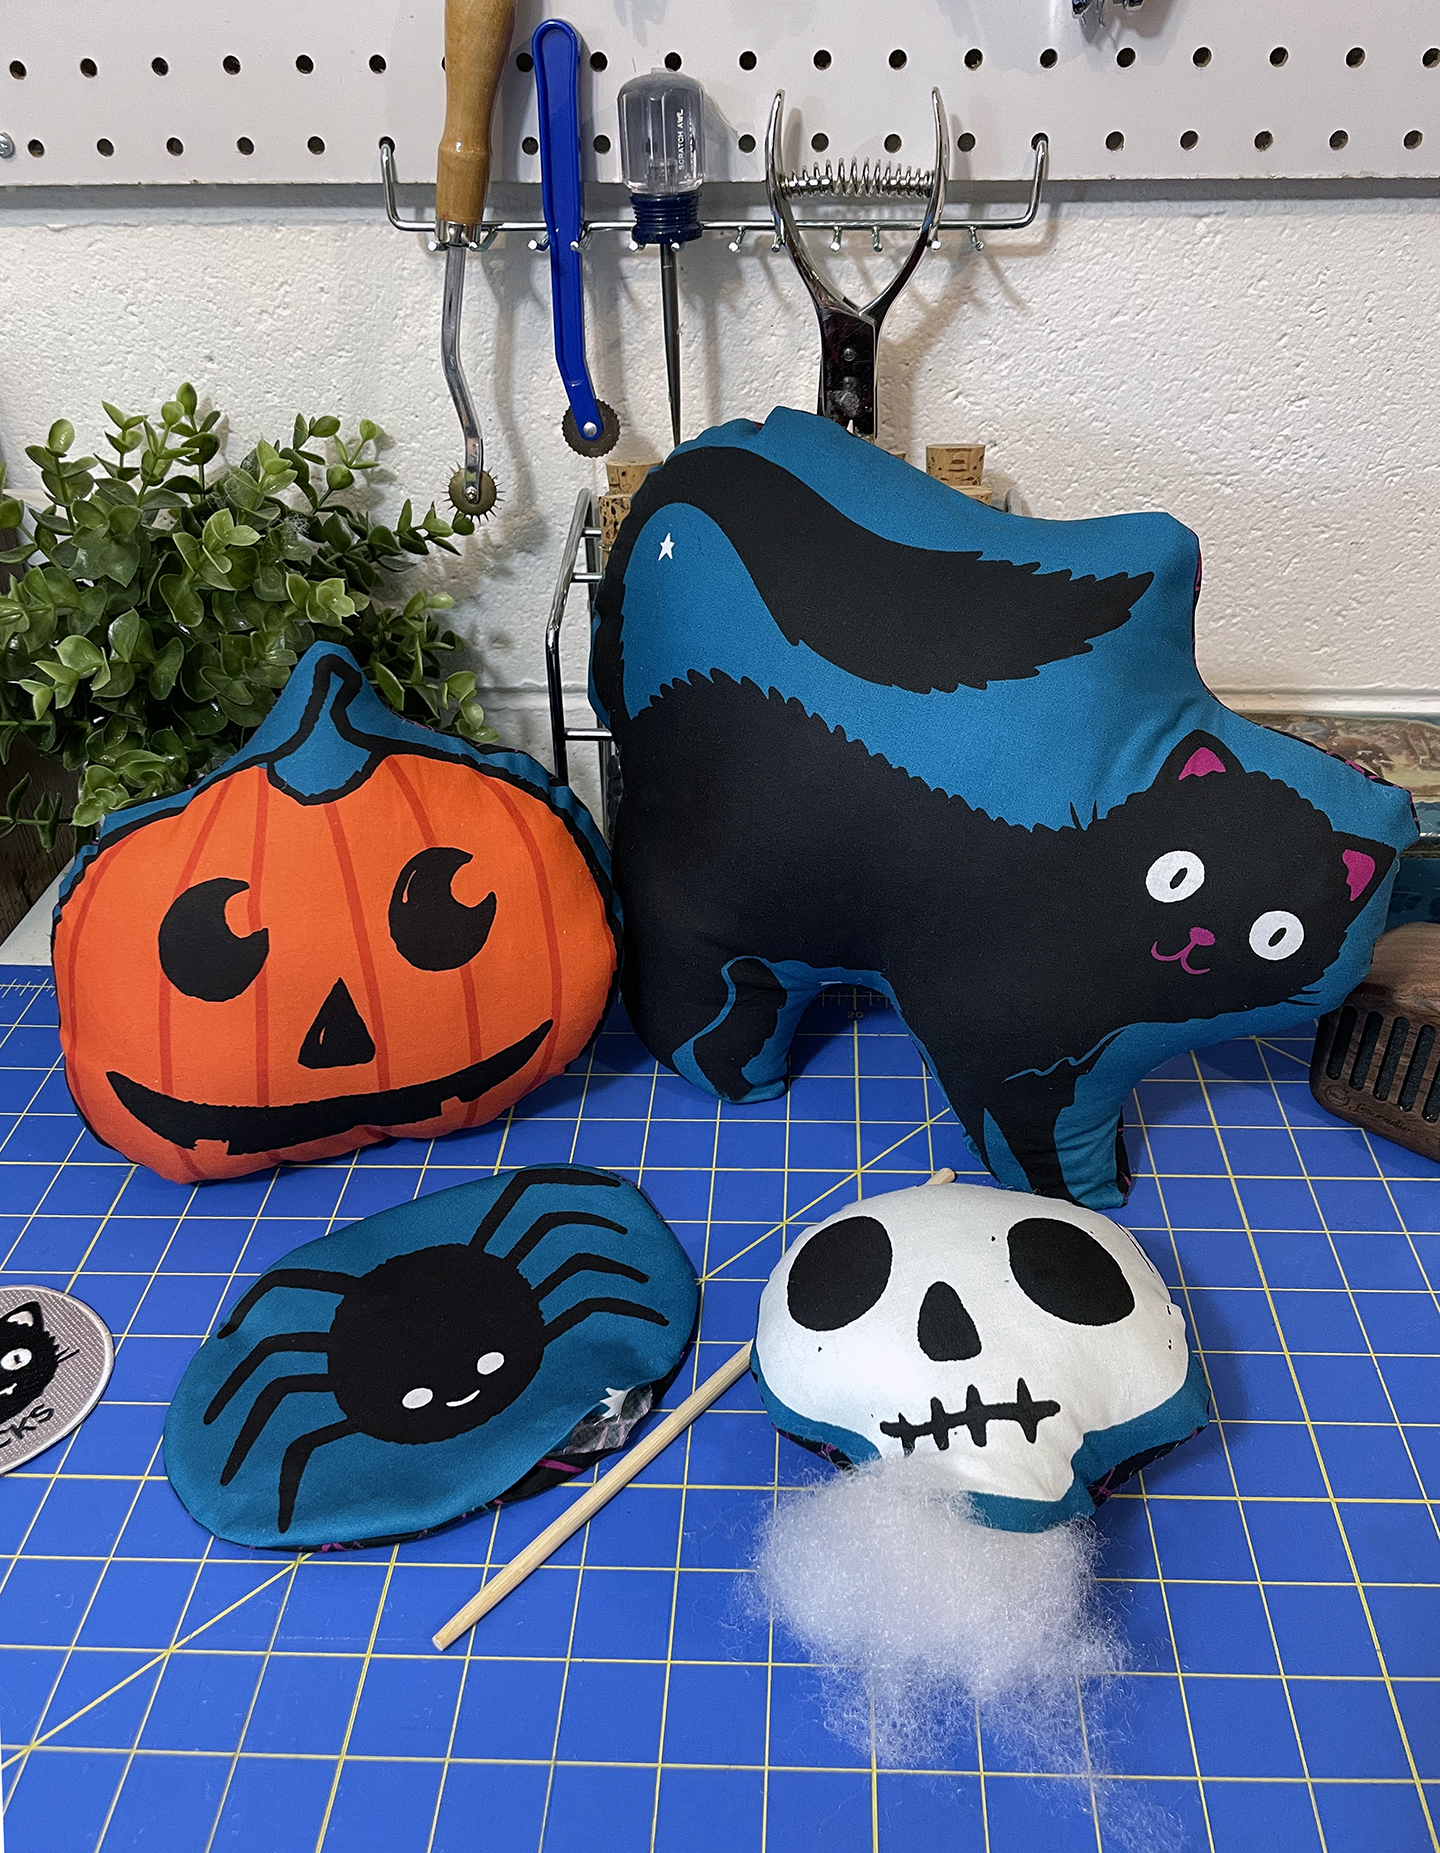
Finally it's time to stuff these softies! I like a firmer softy and so I always use more fiberfill than I'm expecting to for each one. Some fiberfill packages come with a long chopstick that you can use to help stuff any corners or small spaces. When you're happy with how it looks, either machine or hand stitch shut the folded gap edge that we turned through. Now your softies are complete!
Next time in Part IV, we'll be taking the other side of this panel and doing some fun rectangle finishes! I can't wait! Wanna share your own spooky sewalong pics with us? Use the hashtag #candypleaseSAL on Instagram! Next time we’ll be tackling some extra projects! See you soon!
Jane Youn is an artist, artisan, and adjunct Professor of Sewing here at the School for Misfit Makers. She lives in the Mitten State, and loves spooky things, cats, snacks, and crafts. You can follow her @janeyouniverse on Instagram.

News
Welcome to our blog. Here you will find current happenings and helpful resources. The blog is written by The Elder Cat, our resident grump who is jaded from living for over 300 years. Nonetheless, she is loved and knows many things. -Sarah Watts
Recent Posts
